
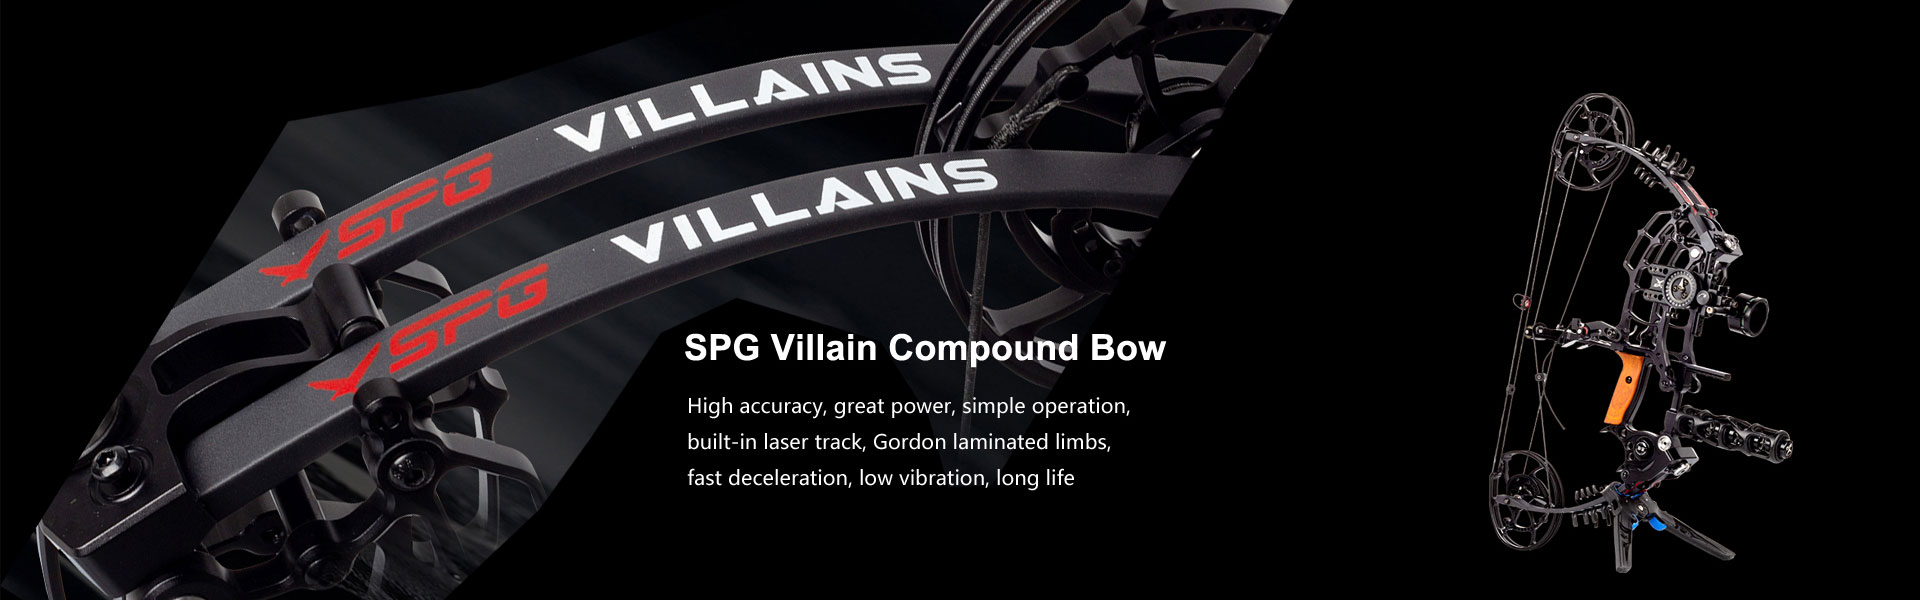
Release time:2024-10-25 17:41:31Clicks:author:SPG ArcheryMain categories:Bows, Arrows, Archery Accessories
1. Archery is the art of shooting arrows with a bow and hitting the predetermined target on the target. The victory or defeat of an archery competition is calculated by the number of rings that the athlete hits the target. The closer the arrow hits the target, the higher the number of rings. When the archery athlete is ready to shoot, he holds the bow with his bow hand and straightens his bow arm, then pulls the bowstring back with his string hand until it is full bow point, looks at the sight and then releases. Because archery is a certain degree of danger, there are various clear regulations for shooting in different archery competitions. For example, except for athletes with physical disabilities or wheelchairs, both feet must be straddled on the shooting line or both feet must be on the shooting line at the same time when shooting; in the competition field, except for the specified practice time or under the signal command of the starter, athletes can face the direction of the target on the shooting line, and other times they are not allowed to shoot in other directions; during the competition, except for the athletes whose turn it is to shoot, no one else is allowed to enter the shooting area, etc. At present, most of the textbooks and articles in China that guide everyone to learn compound bow archery go to two extremes. One extreme is that it is too professional, so that beginners feel like reading a book of heaven, and they feel dizzy and confused, and they can't grasp the key points. I analyzed the reasons mainly as follows: too much information is conveyed, it is difficult to digest in a short time, and the context is not clear. It is only suitable for archers with a certain foundation, but not suitable for beginners to grasp the key points; the other extreme is that it is not detailed, there is no system, it is a hammer here and a hammer there, and the whole article is scattered. What's worse, it is full of fallacies and misleads people. In view of this situation, I tried to write an article mainly for beginners of compound bows. The key points are "simple" and "entry". I hope that through this article, beginners can master the main essentials of compound bow archery in a short time and shorten the exploration period. Since it is a simple entry, I can only talk about the most important things, and the details will not be described. You can supplement or study it by yourself. Let's start with the order of archery movements

2. Standing position: Use a parallel standing position, with the body straight, the two feet open, the distance between the two feet is the same as the width of the shoulders, the toes are slightly outward, and the line connecting the two toes points to the target. (There are also open and concealed positions for archery, which I won't go into here). Target inspection: Turn your head naturally toward the target (note: turn your head naturally, and don't turn your upper torso with your head). Grip the bow: that is, how the bow-holder holds the bow handle. The correct way is: first, the palm's thenar touches the front of the bow handle (the thenar position is as shown in the figure below), and then hold the bow handle with your fingers (although it is simple, it determines the correctness of your bow push action). Nocking the arrow: Insert the tail of the arrow into the bowstring D rope buckle, right below the positioning copper buckle, and ensure that the tail of the arrow is reliably stuck to the string, that is, the bowstring enters the bottom of the tail opening. Then put the arrow shaft on the arrow stand, and pay attention to the direction of the arrow feathers: use the eight-shaped fixed arrow stand, with the main feathers facing down; use the brush arrow stand, with the main feathers facing up; use the rise and fall arrow stand, generally the main feathers can be facing up or down, but for the rise and fall arrow stand with limited space for the arrow feathers to pass through, the main feather direction needs to be determined according to the specific situation to ensure the passability of the arrow feathers. Release device: Use the jaws or hook of the release device to reliably clamp/hook the D-shaped rope buckle of the bowstring, with a slight tension to ensure that it does not loosen. Raise the bow/open the bow: Raise the bow with both arms diagonally upward in the direction of the target (raising the bow can be divided into high raising and horizontal raising. It is better for beginners to raise the bow high, which helps to open the bow smoothly, so here we take high raising as an example). Support the forearm, and pull the bow arm back under the drive of the back muscles. During the backward pulling process, pay attention to the forearm of the bow arm as close to the body trunk as possible, which is conducive to the transfer of the force of the bow from the shoulder and arm muscles to the back muscles in the second half of the bow. (Note: Prevent your fingers from touching the trigger of the release device during the bow opening process to prevent accidental firing). Leaning on the string: After opening the bow, both arms fall back at the same time until the arrow roughly points to the target surface and is ready to shoot. During the bow falling process, pay attention to the sinking of the shoulders first, then the bow holding arm slightly bends and relaxes, and finally the fingers of the bow holding hand relax naturally (do not hold the bow handle). The bow hand rests on the earlobe on the same side, and the bowstring is fixed on the face (the ideal situation is: the bowstring is pressed on the tip of the nose/right nose wing, and passes through the corner of the mouth on the same side. If both requirements cannot be met at the same time, at least one must be met). Note that after the bowstring is close, the elbow of the bow arm should be roughly in the same line as the bow push point, the release device and the contact force point of the hand
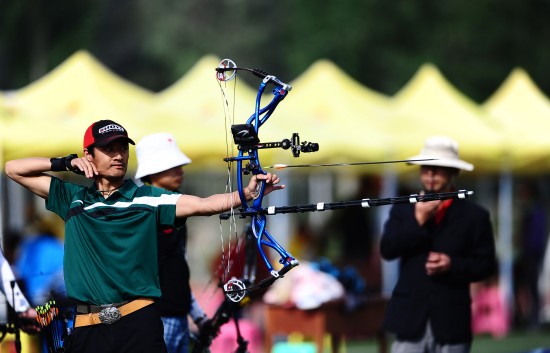
3. Aiming: After the bowstring is close, the bow holding hand continues to support the bow handle with force (note: it is "support", not "hold" or "push"), and the bow arm continues to exert force driven by the back muscles, and the first joint of the index finger of the bow hand is gently placed on the trigger (if it is a hand-held release device, the thumb belly is gently placed on the trigger and slightly pressure is applied. The method of back-forced release device is not described here for the time being). At the same time, the line of sight is through the bowstring window and the sight, and the front sight is fixed at a position slightly above the target point. Steady breathing, slowly lower the bow, so that the front sight and the target point coincide. In this process, do not focus too much on the target, but on the sight aiming point. This is the so-called "star is real and target is virtual". Launch: Under the premise of stable movement and stable breathing, when the front sight changes from an unstable state to a stable state and coincides with the target point, pull the trigger to launch. Note: During this process, the back muscles of the hand pulling the bow should be exerted continuously, and the index finger should be slowly pre-pressed on the trigger. Avoid loosening the trigger and pressing the trigger violently. Motion retention: After firing, do not rush to retract your hands, but keep them in the state of firing for a moment before retracting them. This can avoid the bad habit of unnecessary movements that interfere with firing.
SPG Archery
Tel:+86 13203960531
Email:13203960531@163.com
Add:NoP11-122, Hongyun International
Mall,Jiaozuo City, Henan Province